Tuesday, 25 February 2014

The best of A Greedy Piglet - Gomokuzushi - a scattering of flavours & colours

The last of the series of rice posts from 2010 and 2011. This is such a useful dish to make, it seems long and complicated but it really isn't. And you can adjust what you use to what you have in the fridge, so really useful at the end of the week, when the wallet is a little dry.

Sushi.. say that to a lot of people and you will get the comment.. "oh, I don't like raw fish.." Well that is a shame, but it shouldn't stop you from enjoying sushi. The point of sushi is the vinegared rice which can be topped with lots of things, not just fish. And even if they DO know that sushi is about the rice, not the fish, most people in England will think of nigiri or maki, the rolled or shaped rice, as being "real" sushi.

Well, I am here to tell you, good people of the West, that in Japan there are more kinds of sushi than that. And among them is my personal favourite to make at home, Scattered Sushi.


Scattered sushi comes in two main styles, chirashizushi (Edo style) is usually sushi rice with uncooked ingredients (usually fish) arranged skilfully and artistically on the top.

My favourite, and a very common style for serving at home in Japan, is Gomokuzushi (Kansai style) which has both cooked and uncooked ingredients - the cooked vegetables are mixed into the rice, and the uncooked vegetables and some larger protein pieces arranged on top. It is immensely variable, and with just a few Japanese ingredients, will work with lots of different things that you may have in the fridge or freezer. Gomoku means "five" so traditionally this would have five different flavours or colours added, but really what and how many is up to you. My version uses largely western ingredients, that you will find easily in any supermarket, but there are some oriental ingredients that make it special.

Let's look at the Japanese ingredients first.

Rice. This is the most important ingredient, and the one you can't substitute with anything else. It must be proper sushi rice. Don't attempt this with any other rice. If you only have long grain rice, make a pilaff, if you only have risotto or paella rice, make risotto or paella. But if you want to make sushi, get sushi rice. I get mine in Sainsbury's it is easily found in most supermarkets, and from the oriental suppliers online, so there is no excuse!

Seasoned Rice Vinegar. Again, very important, though if you can't get Seasoned Vinegar (and the Mizkan brand is widely available in supermarkets) you can easily make your own with rice vinegar, salt and sugar, (3 tbs vinegar, 1 tbs sugar, half teaspoon salt, mix together til sugar dissolved) but I am lazy and the seasoned version isn't much more expensive than the plain. (It is delicious sprinkled on salads too in place of vinaigrette). You can use wine vinegar, though I wouldn't recommend it, and if you do then dilute it half and half with water, as it is much stronger.

Sesame seeds: I like to use both black unhulled sesame and sea salt mixed together as gomashio, very easy to make, though it can be bought ready made at oriental supermarkets. Also white sesame seeds, toasted in a dry frying pan give a lovely flavour.

Furikake: A mixture of dry seeds, spices and herbs, and made for sprinkling on cooked rice,  furikake comes in all kinds of flavours, I like the Sanchi brand one, which I buy online. If you want to try some other Japanese varieties, online oriental suppliers are the easiest way to try things if you don't have an oriental grocer to hand. Try Japan Centre or Japanese Kitchen. If you don't have this it isn't the end of the world, but it does add a lovely flavour.

Seaweed Salad: Not an essential by any means, but I do like it. I buy mine in little packets by Clearspring from Sainsbury's but the Japanese suppliers mentioned above will have all kinds of seaweed to try. It is really easy to use, don't be discouraged by the little black shrivelled up bits in the pack, 10 mins in lukewarm water and you will have a bowlful of lovely crunchy slithery seaweed.

The actual method is really an assembly job. You will need the following equipment:

2 saucepans , medium size, one must have a tight fitting lid
A plastic scraper or spatula to turn the rice - I made mine from an icecream carton lid :)
A tray or baking sheet with low sides to cool and turn the rice. You want it quite large and shallow so the rice cools quickly.
Bowls to serve the sushi in


Cook and season the rice, (you can do this a bit in advance, but don't put the rice in the fridge, you want it no cooler than room temperature). Decide on the cooked vegetable element that you want, then the raw salad element, then the protein topping.

For the cooked vegetables I can suggest using up to 4 or 5 of the following:
julienned carrots
Finely sliced runner beans
French beans
peas
edamame (soy) beans
thinly sliced mushrooms
finely sliced asparagus (when it is in season - it is a bit late for this now, but next Spring...:) )
chopped broccoli

for the raw salad part you are looking for things with a nice crunch, so you might like one or two of these:
julienned radish (either English or oriental Daikon/Mouli radish)
julienned cucumber
sliced spring onions
shredded pickled ginger
finely sliced chicory
sweetcorn kernels
raw sliced mushrooms
seaweed salad or shredded nori seaweed

The protein element on top can be either fish or vegetarian, I have never used meat, somehow it just doesn't seem right to me, but there is no reason not to try it if you fancy the flavour. I would suggest two or three of these:

Smoked mackerel
Smoked salmon - both cold and hot smoked are nice
Prawns or shrimps
Fresh raw fish (make sure it is REALLY fresh, here in the city I prefer to leave it alone and use smoked raw fish rather than risk having stale fish)
Shredded crabsticks
Sliced avocado
Sliced thin rolled omelette
Sliced tofu - deepfried or plain


Slice all your vegetables, salad and protein elements first and have them ready.

Cooking the rice:


You should find instructions on the side of the pack of rice. I find it easier to work by volume with rice, so I use a mug full of rice for two large portions (or probably 3-4 ordinary ones.. I am a real pig where sushi is concerned). In a perfect world you would soak this in plenty of water for an hour, and then drain. To be honest, I am often not well prepared in advance, and so usually miss this step.

Put the rice in a medium saucepan, and cover with one mug of water if you have soaked and drained the rice, and one and a half if the rice is dry. NO SALT. Bring to the boil and then reduce to a slow simmer and cook with the lid tightly on for 10 minutes. Then turn the heat off completely and leave the rice for another 10 minutes. You are looking for a lightly sticky rice that will turn out in one piece, but will fall apart into separate sticky grains, you don't want a light fluffy rice like basmati, nor do you want a porridge. Turn it onto a tray it should look like this:


Using a scraper or a spatula spread the rice out by chopping it - you don't want to stir, it will break the grains. Sprinkle about 4-6 tablespoons of the seasoned vinegar over - this will depend on your taste, sprinkle 4tbs it over, chop and fold it in, then taste to see if might need any more. (If you have good coordination or a handy sous-chef, you can fan the rice as you turn it to cook it down faster. You have to be able to pat your head and rub your tummy at the same time, so do check that first.) Then sprinkle the sesame seeds or furikake if you are using it over and chop and fold again.


Cover the rice lightly with a damp teatowel and put to one side.

Cooked Vegetables:

Put your selection into a saucepan, and just cover with boiling water, NO SALT, and blanch for a couple of minutes. Drain, and immediately dress with a couple of shakes of soy sauce. Put to one side to cool slightly.


To Serve:

Put each portion of rice into a large bowl - I use a pasta bowl.


Top with a portion of cooked vegetables (this has carrot, runner beans, peas, edamame, and broccoli) and mix these in.


Top with your salad selection (I just used the seaweed salad here)


Then arrange your protein (smoked mackerel, hot smoked salmon, tiger prawns) neatly on the top.


And that is it!

And if like me, you are trying to lose weight with Slimming World, you will be delighted to know that with careful selecting of the protein (there are a few syns in smoked mackerel) and allowing a syn for the sugar in the rice, everything else is FREE FOOD!


The best of A Greedy Piglet - Fish and Rice #1 - Kedgeree

This post is from November 2011 - I was talking about my gallstones back then. So that is now 2 years and I still have the damned things. Fingers crossed this is the LAST YEAR I have to talk about them, and worry all the time about what I can or can't eat. Moan over...

....................

Did I tell you that apparently I have gallstones? That would explain the nasty pain running in a straight line from my breastbone to between my shoulderblades then... :(

Lots of things are making my innards play up, mainly red meat and anything fatty. But Fish and Rice seem pretty safe. And there really are quite a lot of things you can do with fish and rice.


One of my all time favourites is Kedgeree, and I promised @ladytubedriver and @masamitsusato that I would tell them how I usually make it. I am sure it can be made a lot more complicated, but at the end of the day, I am only interested in making a tasty dinner, not competing for Masterchef!

So I make it like this, quantities are pretty adjustable according to how many people you are feeding, how hungry you are, and what you have in the fridge..:


Ingredients
  • Basmati or similar long grained rice
  • Chopped onions
  • Flaked cooked smoked fish
  • Hard Boiled eggs - cut into large chunks
  • Spices - curry powder, whole spices if you like.
  • Chopped parsley
  • Lemon Juice
  • Cooked frozen peas (optional, but I like them! )
  • Lump of butter
Instructions
  1. Cook the long grain rice. Basmati for preference. One and a half handfuls per person, just cooked, kept warm over steam in a sieve.
  2. Hard boil the eggs - one or two per person, only just hard boiled, so about 9 mins for medium eggs.
  3. Poach the fish if you are using fresh smoked haddock or cod. Take any skin off, check for bones and flake into big chunks. You can also use smoked mackerel, skin that, and break it into pieces. Again check for bones. Prawns can be added too if you are feeling extravagant.
  4. Allow half an onion per person. Chop finely and fry in a little oil (or frylight if you are cutting your oils right down as I am). Once it is nicely soft but not brown or crisp, add a teaspoonful of curry powder (which ever one you like - I like to use garam masala) and a splash of water. Saute until you have a nice aroma, and the water is evaporated. I find adding a little water helps to stop the spices scorching.
  5. Add the rice to the onions, turn it in the spicy mixture, taste and adjust the seasoning. Add the fish, and turn the heat right down, allow the fish to heat through. Add the peas if you are using them. Stir the parsley through and add a squeeze of lemon and a nice lump of butter (as much or as little as you like, but I think it needs just a little bit even if you are keeping your fats down). Put the lid on, and let it sit on a very low heat for a few minutes until piping hot.

It really is simple, you can add or take away anything you like, but to call it a kedgeree you need it to have
  • smoked fish
  • rice
  • eggs
  • curry
Yum yum!

The Best of A Greedy Piglet - Fish & Rice #2 - Prawn, Pea and Leek Risotto

I am rather partial to a nice risotto, especially one with something fishy in it. It can be as luxurious as you wish (lobster, crab, fresh clams, scallops, exotic fish all come to mind...) or relatively simple, using whatever you have to hand in the fridge or freezer. This is a good standard store cupboard and freezer version, that you can jesse up how you like - or how your budget likes probably.


Firstly, what makes a risotto different to other rice dishes? Two things - the rice that you use, and the way that you cook it.

The rice should be medium grain, so not a light dry rice like basmati or other long grain rices. They contain a specific type of starch which doesn't release easily into the cooking liquid, so stay light and fluffy when you cook them. And not short grain Japanese rice which releases plenty of starch and makes a sticky grain, perfect for sushi, but too solid for our risotto. Spanish paella rice such as Calasparra will be fine if you have it (paella rice is also a medium grain, and the difference in texture between paella and risotto is partly from how it is cooked). For a really good risotto I like to use Italian rice.

Italian rices are nearly as long as long grain, and nearly as wide as short grain, and have a soft starchy outside around a firm core. There are three main risotto rices you will find easily in the supermarkets and delis - Arborio, possibly the most well known, Vialone Nano (used in the North East, around the Veneto, where my mother in law came from, and perfect for the Venetian risi e bisi ) and my favourite, Carnalone. Try them all, and see which you prefer, they are all good, and all create a silky, creamy sauce as they release their starches into the wine and stock that you will use to cook them.

Which brings me to the second thing that makes a risotto. The way that you cook it. You need to stir it. Delia Smith may believe that you can make a risotto by adding all the liquid to the rice and cooking it in the oven, but I am afraid that to me that is an Italian savoury rice pudding. Doubtless very fine in its own way, but not a risotto.

I think that you really do need to stir the rice, not all the time, and not fiercely, but consistently and especially towards the end, from when the rice is about three quarters cooked. You are looking for a creamy smooth sauce to surround each grain of rice. The rice should still be separate in this silky bath, not stodgy and stuck together. Whether you like it al dente or softer (I don't like to have any hard core in mine) it should never be stiff enough to stand up.

It should gently subside when you put it in the plate, like a sulky odalisque relaxing on her couch...See the tummy on the one on the right of this Ingres painting of the Turkish bath? That is the slumpy effect you want.


So that is the orthodoxy.

Now here is how I make my risotto, which probably has sufficient short cuts to make an Italian mother in law blanch.

Prawn, Pea and Leek Risotto


Ingredients:
  • 4 handfuls of risotto rice
  • 1chopped shallot
  • 2 small or one large leek, finely sliced
  • approx 1 litre fish stock (I use 1 heaped teaspoon of Essential Cuisine fish stock powder in 500ml water, then use plain boiling water when this runs out.)
  • 1 tsp plus 1 tbs butter
  • 1 tsp olive oil
  • 1 sherry glass of white wine, sherry or vermouth
  • large handful of frozen peas
  • large handful of chopped parsley
  • 250g pack of frozen cooked tiger prawns
  • 4-6 strands saffron
Instructions
  1. Put the frozen prawns on a plate to start to thaw. Do not rinse them, the ice has a lot of prawny flavour.
  2. Put the kettle on, if you are using strong fish cube stock plus boiling water. If you are using fresh stock, put it in a saucepan to warm through, but put the kettle on as well in case you need a little more water at the end.
  3. In a large saucepan, melt the 1tsp butter and the oil, saute the shallot and shredded leeks gently until they are soften.
  4. Add the rice and saute gently for 5 mins until it starts to stick slightly.
  5. Add the alcohol (I like sherry but use whatever you have around) and allow to evaporate about half way, stirring with a wooden spoon.
  6. Start to add the fish stock about 250 ml at a time, stirring from time to time. Don't allow the stock to completely evaporate before adding the next slug. Keep stirring!
  7. When the rice is about half way cooked, add the saffron and the peas. Keep stirring, keep adding water/stock as it cooks away.
  8. When the rice is cooked to your taste, add the prawns (don't worry if they are still frozen, they will thaw in the heat of the rice) the chopped parsley and the final tablespoon of butter.
  9. Give a stir, put a lid on and allow to sit for about 5 mins until the prawns are thawed and heated through. The rice should still be slumpy not stodgy. If it is too dry then add a little more water/stock and give it a sideways shake to mix it in.
  10. Serve in shallow bowls.
  11. DO NOT ADD CHEESE! Unforgiveable gaff, putting cheese with a fish risotto.
  12. Unless you like cheese of course. In which case, break the rule, make the gaff, and add it with the prawns and the butter at the end.

The best of A Greedy Piglet... M-M-My Granola!

This recipe was first posted on A Greedy Piglet back in July 2010, at the time I had not really eaten granola, muesli I knew and didn't like that much (too dusty) but once I had tried my own granola, I was pretty hooked. These days, I am lazy, and  eat ready made granola, as the offerings from the likes of Lizi's (their Pecan and Treacle is to die for...), Rude Health, Crush Foods, even mainstream cereal people like Jordan's and Dorset Cereals, have improved immeasurably over the last couple of years.

This particular recipe was developed to be relatively low fat, and to fit in (just..) with a Slimming World type eating plan, but still be flavoursome, and crunchy. I stick by what I say in the original post, granola is extremely variable, so long as you keep the rough ratios the same, but don't bother trying to make it very low fat. If you really want very low fat, then just eat porridge. .

Have a go, and let me know what you think.

ORIGINAL JULY 2010 RECIPE:


Sometimes, when I make my breakfast, I find myself singing My Sharona, (with head banging bits)... I love the Knack, but it isn't that. Is it the beat? The haircuts?

It is, of course, down to a pun, and one of my favourite breakfasts: granola. I had never eaten granola until Rachel (@ladytubedriver ) at my Slimming World group asked me if I could try to make something that would work within our Slimming World diet requirements. So with nothing but a rough idea of what granola was, I worked through Google and set about removing the oil and sugar to make a lowfat version.

It was... ok... it needed much longer baking than I gave it, and went stale and soft rather quickly. It was back to the drawing board.

Camilla at Rude Health warned me that it was very hard to make lowfat granola. It is intrinsically high fat. But I was determined to at least give it a try. To help me to work out what was so delicious about granola Camilla also sent me a sample (sample? hey, she is a generous lady, I received a fullsized pack, thanks again Camilla) to try out.

I worked my way through that packet in double quick time. Waitrose hadn't started to stock Rude Health Granola at that time, but I needed more granola, so I tried out Dorset Cereals Honey Granola.

Both of these granolas were much better than mine had been, and raised the standard I wanted to achieve.

I decided that I liked both equally. Both these granolas are packed out with seeds and nuts, not very sweet, no raisins or dried fruit, and crunchy without being hard. Back to my drawing board with a much better idea of what I was aiming for.

Leafing through my Nigella Feast one day, I came across her recipe for Andy's Fairfield Granola.. This sounded the business. But still very sweet by the sound of things. Could I cut the sugars down and perhaps the oil and still get good, golden granola?

Oh. Yes.

M-M-My Granola is like Goldilock's porridge. Just. Right.

What I have also discovered is that good granola is very much a personal thing. You may like more oaty goodness. You may like more nutty nuggets. You may even (god forbid..) like it sweeter. But this is how I like my granola, and why I get through a shedload of it each week.


You need two groups of ingredients, the dry cereal itself, and the "glue" to stick it together into crunchy lumps.

For group one I like a rough ratio of:

50% by weight grain flakes : I use jumbo oats, porridge oats and fine oatmeal in whatever proportion I fancy, or have hanging about in the cupboard. You could also add any other grain flakes you like the sound of.

25% by weight seeds: linseed, hemp, sunflower, pumpkin, sesame are all seeds I have in the cupboard so I just mix up whatever takes my fancy.

25% by weight nuts: Almonds. hazelnuts, pecans are a must, but you could use any nuts you like.

So ingredients for my usual batch are:

Group 1:
600g grain flakes
300g seeds
300g nuts

Group 2:
1 tbs oil - any flavourless oil is fine, I use grapenut
2 tbs sweetener - you can use honey, agave or date syrup, or I have happily used marmalade
2 tbs apple sauce - either home made apple sauce or bought (I use Sainsbury's Bramley Apple sauce)
2 tsps ground cinnamon
1 tsp vanilla extract
half tsp salt

Chop the nuts up somewhat (I use a mini food processor, I have also used a mortar and pestle which worked fine), add to the grains and seeds in a medium size bowl. Mix well.

In a small saucepan mix the Group 2 ingredients, warm until they can easily be combined. Tip into the dry mix in the bowl, and thoroughly combine.

Tip the granola mix out onto a baking tray, spread out roughly, don't break the lumps too much, you want them to stay stuck together. Bake at Gas Mk 3 for between 40 mins and an hour, raking through from time to time so that it browns evenly. You are looking for a deep golden colour - it will still be soft, as it crisps up as it cools. Allow to cool, and keep in an airtight container.


(For Slimming World converts, 1 oz, 28 grams, which is approx a level one third measuring spoon has 7 syns. If you can stop at one ounce in a day, you are a better man than I am, Gunga Din.)

Monday, 24 February 2014

Pukka Paella?

I was interested to read in the Guardian about the advent of Wikipaella. According to the Guardian article, "Wikipaella aims to help "police" paella around the world, said co-founder Guillermo Navarro. "It's a dish that's really trendy these days. And there's lots of people taking advantage of it and selling what they call authentic, traditional or Spanish paella."

So the question is, is this a proper paella in those terms or just dinner?  

Is it possible for an English person to make a paella that would be approved of by a Spaniard? In a frying pan?


Somehow I doubt it, but this makes for a very tasty dinner.

I use a recipe that I found online a long time ago, but have long lost the weblink to. I doubt it is authentic, as it cooks the chicken with onions and garlic separately first, and then adds it to the rice.  But it really works well, so give it a go and let me know what you think.


Paella for two people:

Pan one: small saucepan
two skinned and boned chicken thighs, cut into large chunks
one onion, chopped roughly
two garlic cloves chopped
2 tbs olive oil

 Pan two: Frying pan - roughly 12-14 inch diameter, or a paella pan if you have one:
One mugful of paella rice
One and half mugfuls of hot chicken stock
half teaspoon of smoked agridolce paprika + several strands of saffron, steeped in a tablespoon of stock
handful of frozen peas
two or three heads of skinned peppers from a jar, cut into strips
half a dozen raw jumbo prawns per person
lemon wedges. 

Heat the olive oil and saute the onion and garlic. Add the chicken and season liberally. Cover the pan and allow to cook on a gentle heat until nearly cooked and just tender, around 10 mins. 

Heat the frying / paella pan and add the chicken etc from pan 1. Stir in the rice and allow to toast a little. Add the stock and the steeping saffron/paprika. Give it all a good stir bring it to a simmer, and then turn the heat right down as low as it will go.  Don't cover the pan. Allow to cook for around 20 minutes until the rice can be bitten without a hard centre.

Scatter the peas and red pepper strips over the top, and lay over the raw prawns. Cover, and allow to continue to cook until the prawns go pink all the way through, but be careful, prawns overcook very quickly. And yes, the ones in the picture are slightly overcooked... I went and got preoccupied - probably Twitter.. :(

Serve with some lemon wedges to squeeze over.


Saturday, 22 February 2014

The best of A Greedy Piglet: Malteser Cakes

Did you see the little sponge cakes I made for my mum for Mother's Day? I thought a variation on that theme would be nice for Easter. I meant to get some little eggs for the nests. And some flakes. But guess what... I didn't. And now the shops are shut. Oops.

But I did have plenty of chocolate in the larder, and some maltesers too. So this is what we ended up with..


I used the standard Victoria sponge recipe from the other little cakes, and filled them with chocolate buttercream rather than the vanilla. The icing is a simple chocolate ganache.


Firstly, make the ganache.
  • 200g dark chocolate chopped
  • 200g double cream, heated to just under boiling.
Add the chocolate to the cream off the heat allow to melt without touching for a few minutes, and then stir until melted and smooth. Remove two large tablespoons to a small bowl and let that cool down to room temperature, whilst keeping the rest in the saucepan to stay warm.
  • 150g unsalted butter, at room temperature
  • 150g icing sugar
  • 50 ml double cream
  • 2 reserved tablespoons chocolate ganache
In a stand mixer for preference, or using a hand mixer, beat the butter until soft and smooth, sift the icing sugar over the butter and, covering the bowl with a clean teatowel or using a splashguard, mix on minimum speed until the sugar is blended into the butter. (Beware that without the teatowel or splashguard (and even with to a degree) your kitchen will be coated with icing sugar! ) Once the sugar is safely coated with the butter, increase the speed and whip for several minutes until smooth and fluffy and white. Add the double cream whilst continuing to whip, and then finally blend in the cooled chocolate ganache.

Split the cakes and pipe or spread each lower half with the butter cream before replacing the top.

Put the cakes on a cooling rack over the top of a sheet of parchment.

Spoon the warm ganache over the top of each cake, using a palette knife to smooth more over the sides but not touching the top. You will find lots will drop through the rack to gather on the parchment. Scrape this back into the pan and use this to fill any gaps on the sides.

Allow to cool for a while before topping with the maltesers, or they will slide off.

Eat one for quality control and then make the tea and eat another one.

The best of A Greedy Piglet : Perfect Little Cakes for Mother's Day

These little Victoria Sponge cakes are perfect for coffee with your Mum on Sunday, just the right size for a bite or three.


I wanted to try out my new loose bottomed individual cake tin (bought from Sainsbury's I think) and I can say it is brilliant. I love the straight sides on these cakes, that means that you can slice and fill them just like a large Victoria sponge but still have a bite sized cake.

I used a standard Victoria sandwich mixture, with a little cornflour added in for extra lightness. Vanilla buttercream (made with less sugar than many recipes, I like the buttery flavour rather then just tasting sugar) and no jam was the request. So plain yet perfect ....

Victoria Sandwich cake mixture

makes 12 small cakes
  • 2 large eggs - weigh these in their shells
The weight of the eggs in :
  • Unsalted butter - very soft, leave in a warm kitchen overnight
  • Caster sugar
  • Self Raising flour - weigh the flour, then remove one tablespoon of flour and replace with cornflour

Cream the butter and sugar until very very light and white. I give it a good 10 minutes in a stand mixer, if you can stand the boredom give it that and a bit more with a hand mixer. On a slightly lower speed, beat in the beaten eggs roughly one third at a time, ensuring that the eggs are totally incorporated before adding the next. If they start to look grainy (curdled) then add in a little flour as you beat the eggs.

When the eggs are fully incorporated, fold in the flour, and a spot of milk if you think it is too stiff. You want a mixture that will drop slowly from a metal spoon held sideways.

Spray the cake tin with release spray or rub with a buttery paper, and fill one soup spoonful to each cake hollow.

Cook at a moderate oven, Mk 4 for 15-20 minutes until golden and starting to shrink slightly from the sides. Do not overcook or they will dry out.

Remove from the oven and allow to fully cool on a rack.
Whilst they are cooling, make the buttercream. I made a simple buttercream for this, although I might try out a meringue one next time.

Vanilla Buttercream

Here is my lower sugar version of the standard buttercream,
  • 150 g unsalted lactic butter (I like the flavour of lactic butters, like Lurpack or President, but English sweet cream butter is fine)
  • 150g icing sugar
  • 3 tsps vanilla extract
  • 2-3 tablespoons milk
Beat the butter until very soft, beat in the vanilla extract and 2 tablespoons of milk, then add the icing sugar, and beat until very light.

Add the extra milk if you think it needs it.
BE AWARE that without a splash guard the icing sugar will cloud up and go everywhere. If you are working by hand, or don't have a guard, try to fix up a Heath Robinson type contraption with a large teatowel to keep the sugar in the bowl until it has started to mix in

Cut each little cake in half and sandwich with buttercream using a piping bag or a palette knife. Or a teaspoon if you don't have either of those...

Sprinkle the top with a little caster sugar and scoff quickly before they go stale.


The best of A Greedy Piglet: Yoghurt and Ricotta Mini Cheesecakes

I love cooking with yoghurt, and have been meaning to pop some of my favourite recipes here for a while now, so forgive me for suddenly popping several on at once.


These little cheesecakes I made using my straight sided mini Victoria Sponge tin, which I love very much. The cake size is perfect for individual cakes, and the straight sides give a better finish than using a sloping muffin tin. The nonstick coating on this tin is amazing too, no lining of the sides, and the loose bases just push up the cakes easily when they cool down.

I used Total Yoghurt Fruyo for these, it is already sweetened and so I didn't add any extra sugar, but I think the recipe may need just a smidgeon. Not a lot, nowhere near as much as you would put into a normal cheesecake recipe. I also used part ricotta to lighten up the mix, (and because I had some in the fridge...)

The base is a mixture of ordinary digestive biscuits, some Lizi's granola that I am liking at the moment, and a little bit of crushed Lotus biscuits to add a caramel flavour. The topping is just crushed Lotus biscuits on some and Lotus biscuits and granola on others.

I served these for dessert with some sliced strawberries and vanilla syrup (the kind you can get in bottles for making flavoured coffee - I find this very useful for desserts)


Recipe: to make 12 small cheesecakes

Base:
Filling:
  • 150 g ricotta
  • 150g full fat cream cheese
  • 1 170ml tub Total Greek Vanilla Fruyo
  • 1 170 ml tub any fruit flavour Fruyo (I used peach this time, all are good)
  • 100 ml double cream
  • 2 eggs (medium or large)
  • 1 tablespoon cornflour
  • 1 teaspoon vanilla extract
  • juice of one lemon
  • Sugar to taste
Topping
  • crushed Lotus biscuits, mixed with granola if desired.
Method:
  • Mix all the base ingredients together and put one dessertspoonful in the bottom of each of the tin cavities. Press down firmly. Bake for 10 mins at medium temperature Gas mk 6/400/200. Remove and allow too cool slightly. Lower the oven temperature to Gas mk 4/350/180.
  • Using an electric whisk (hand held or stand, no matter) or a wooden spoon, beat the cream cheese and the ricotta until smooth. Beat in all the other ingredients, taste the mixture and add the optional sugar if you think you would prefer it slightly sweeter - it isn't important to the structure of the cheesecake, it is purely for flavour. Don't over beat, you don't want too much air in the mixture, it should just be well blended and very smooth.
  • Using a small ladle, fill each of the tin cavities to about half a centimetre below the rim. Rap the tin on the table to knock out any air bubbles.
  • Bake for 20 minutes until there is just a little wobbly bit in the middle of the cheesecake. Remove and allow to cool in the tins until you see the sides shrinking away from the tin. Remove and allow to cool, chill if you like.
  • Sprinkle with topping crumbs, and serve with fresh fruit.
I found they lasted about 3 days happily in the fridge. They might have lasted longer, but they were all eaten by then!

The best of A Greedy Piglet : Yoghurt & Ricotta Lemon Almond Muffins

These are simply gorgeous.. I found the recipe whilst wandering around on the net, and I couldn't tell you how I got to it. But I am so glad I did. These are called "biscuits" by Giada di Laurentis , who is an Italian American chef from the Food Network US site. Now Food Network US have the recipe, but it seems not the video , whereas Food Network UK have the video, where it is called Lemon Ricotta Cupcakes, but not the recipe... yeah, I agree, Nuts. Almonds mainly.... (ho ho ho) (Sorry.)


Well, I don't call these biscuits, neither US nor UK verions, and they aren't cupcakes to my way of thinking as they don't have any buttercream on top. But they are ever so delicious muffins. So that is what I am calling them.

Here is the video showing you how to make them... sorry, Food Network don't seem to want me to embed the video so you will need to visit the site. I hope this will work if you are outside the UK give it a go and let me know if it works.

http://www.foodnetwork.co.uk/video/simple-lemon-ricotta-cupcakes.html
And here is the original recipe:

Food Network Giada de Laurentiis - Nonna's Lemon Ricotta Biscuits

As usual, I tweaked it a bit. I kept to the cup measurements so if you prefer grams I am sorry, when I make it again I'll measure it up and put the metric version here too.

I made 12 in muffin cases


Tweaks:

I used half ricotta and half Total Greek 0% yoghurt
I added a half teaspoon of Lemon extract

Otherwise, surprisingly I stuck to the recipe. Delicious light and fluffy cakes, with the nuts on the top crispy. Definitely one to recommend.

Thursday, 20 February 2014

Bubble Gum Plums from South Africa and Creamy Custard from Cornwall

Lovely plums!


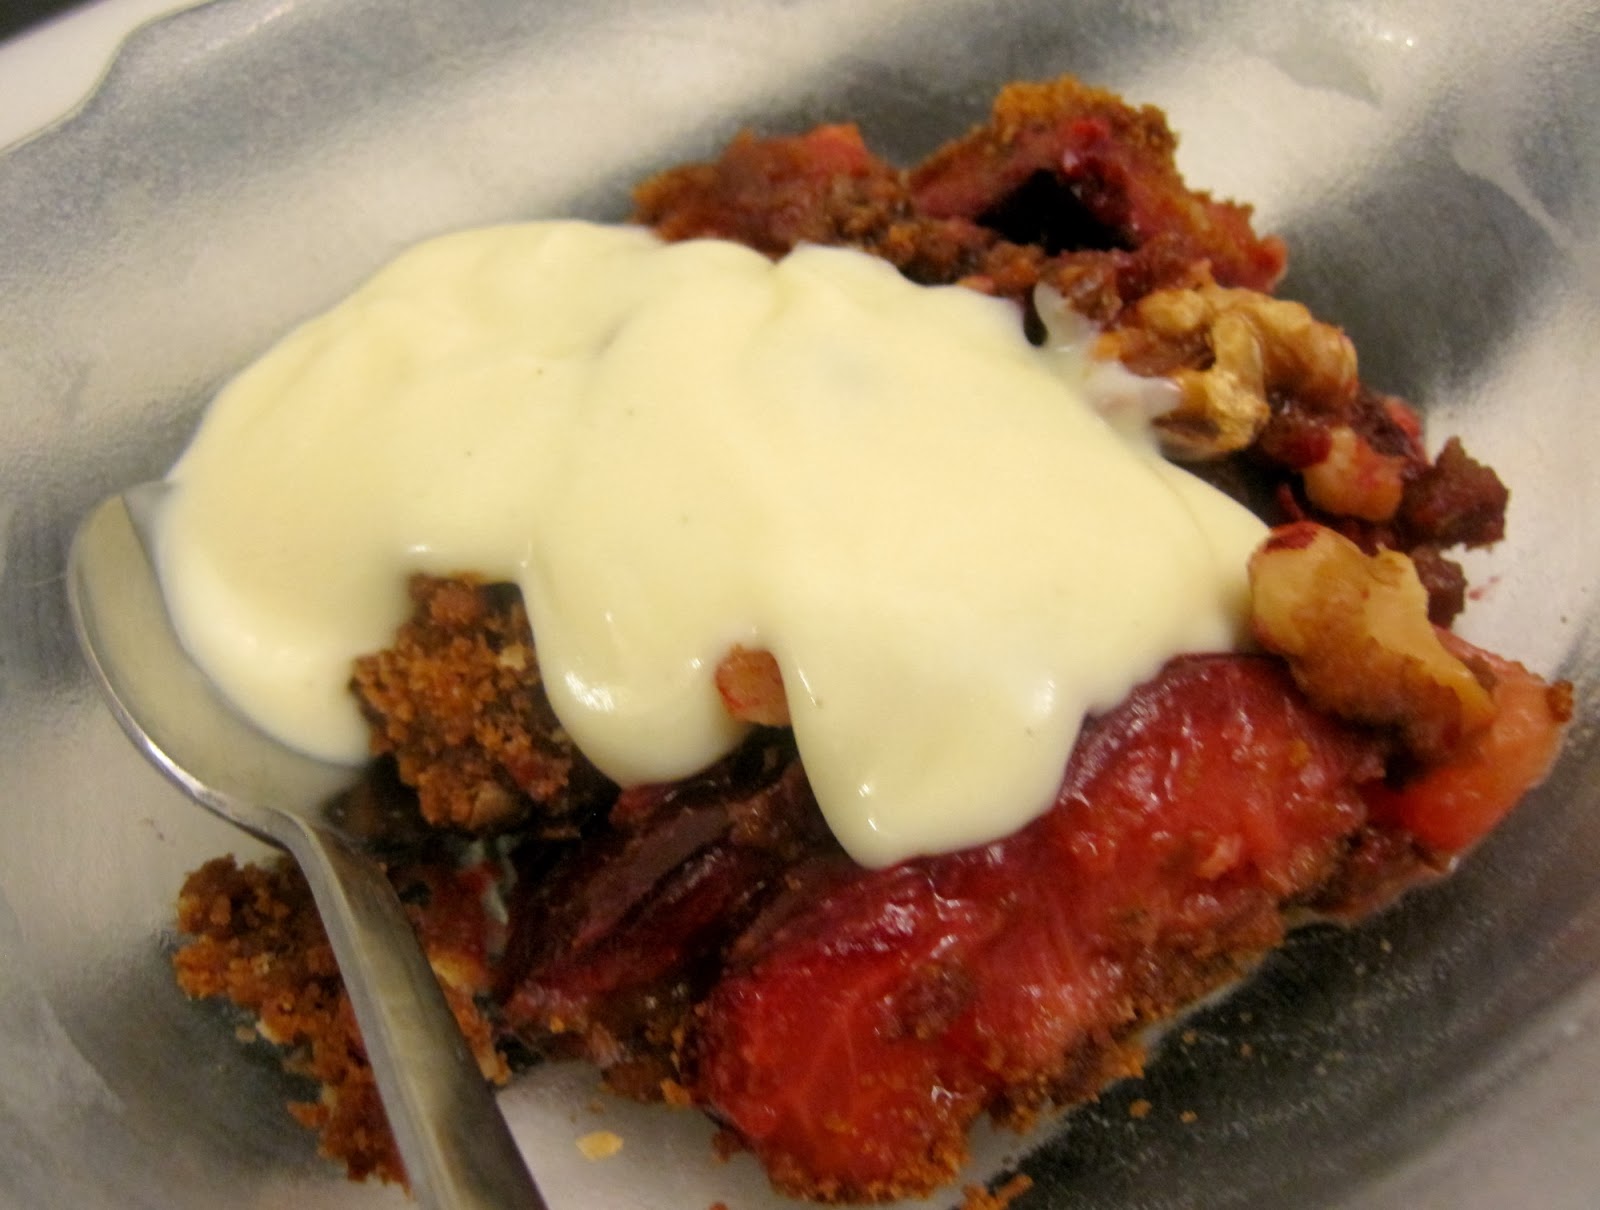
A delicious present from South Africa, these Flavour King plums are so unusual, deep red flesh with an unusual bubblegum flavour. Sometimes that can be a little too prominent a flavour when they are raw (although if you love bubble gum you'll love these...) but they are just gorgeous cooked. They hold their shape but soften into juicy globes.

I do look forward to South African fruit, their stone fruit in particular is so delicious, and comes through at a time when our homegrown fruit is at its nadir, with only apples really holding their own. I don't mind buying imported fruit when it is in season at its growing point, I think that farmers all over the world deserve support.

I wanted a simple dessert to have with some equally delicious Rodda's custard. Crumble is easy, simple and very tasty. This is simpler than most, using caramelised biscuit crumbs for the crumble part, with a few walnuts for added crunch.

So: cut a couple of large plums (Flavour King if you can find them, but any plums are delicious) and stone and quarter them. Pop into an ovenproof dish, fitting the pieces in tightly.


Crush some Lotus biscuits (or any other sweet caramelised biscuits you like) and sprinkle over the plums. Top with some slivers of butter (Rodda's creamy salty butter for preference, but otherwise whatever you have in the butter dish..) and a handful of crushed walnuts.


Bake for 20 minutes at mark 6


serve with cold, luscious Rodda's creamy custard....


In a hurry? 

Then this fast and dirty version is for you... just zap the plums in the microwave for 1 minute, top with the crushed biscuits, a good slug of custard, and then a sprinkle of granola  ( I used my favourite Lizi's Treacle and Pecan).  Eat in front of the telly. Betcha it only takes you 5 minutes tops from chopping the plums to wiping your sticky lips..


Note:  I received the plums, custard and granola as gifts, but all comments and recipe are unpaid for and my own opinion

Tuesday, 18 February 2014

The best of A Greedy Piglet - The Mini Gibassiers

 (first published on A Greedy Piglet October 2013)

Mini Gibassiers are just as delicious as big ones!

Do you remember the Gibassiers I made last year after Aldeburgh Food Festival, when I had them at Pump Street Bakery? I only make these in the wintry months, they don't feel right in the summer, with all the berries around there are lots of other things to make, but once the nights draw in and the light fades, they come back into their own.


I made trayfuls of these minis for Thane Prince's Cook Book Club (held every month at the Draper's Arms in Islington.. do come one day and say hello!) where I have been elected to be in charge of the bread etc. for the monthly meetings. This month, we were so lucky, we had Paul A Young come to talk chocolate with us, and the wonderfully knowledgable and kind Fiona Beckett brought all kinds of different dessert wines to match the chocolate.

I didn't want to bake something with chocolate in it, as I thought here would be plenty of that from other members of the group, so I decided on these little gibassiers which I thought would complement any chocolate that was around. I changed the flavourings from anise and citrus peel to orange zest alone. And left out most of the orange flower water , replacing that and the water with fresh orange juice. Really really delicious little bite sized morsels they came out.


Interesting point about the flour this time as well. I had popped into our local Romanian delicatessen earlier in the year, searching for the bottles of sour cherries that I know are popular in all the Eastern European countries, and in chatting to the charming Romanian owner, got to talk about flour for sweet yeast doughs. She recommended a 000 flour that was made in Romania, and is very very finely milled, and that she said was perfect for panettone. I didn't get to make any panettone, but I do now keep the flour in just for brioches and buns like these. It has some additives that obviously affect the way the yeast reacts, but it makes a fabulous light delicate crumb. If you ever see it (I got my last lot in my local Turkish supermarket of all places) get it and try it and let me know what you think.


The recipe is slightly changed from before so I have copied it here and adjusted it for you - don't forget it is a 2 day affair if you decide to give it a go:

Preferment:
180g bread flour (I used Dove Farm)
110g milk (I used skimmed milk with a fat slug of double cream in it )
half teaspoon Dove Farm instant yeast.

Mix all together thoroughly, leave covered tightly at room temperature overnight.

The following morning you will need the following ingredients :

Dough:

Liquid part:
3 x whole large eggs
Olive oil 80 g
80g Fresh squeezed orange juice (roughly the juice of one large orange, zest the orange first to use later)
1 tbs orange flower water (or just leave it out if you don't have it)

Dry part:
400g oo or 000 flour (I used the Romanian flour above but if you can't get it then any 00 flour or failing that, any plain flour)
100g caster sugar
7g (one tsp) fine salt
15g instant yeast or 30g fresh yeast - I have started to use fresh yeast these days in preference to instant, I think the crumb is softer. If you have a Sainsbury's with a bakery section, ask them you should find they will sell you fresh yeast very cheaply, I pay 20 for 50g at my local Sainsbury's.

Additions:
70g unsalted butter
finely zested rind of two oranges
120g melted butter
Caster sugar for finishing
Mix the liquids in a bowl and squish in the preferment. It won’t fully dissolve but will be easier to combine with the rest of the dry ingredients.

Combine the dry ingredients in a bowl and then add the liquid ingredients above. Now comes the fun part. If you have a stand mixer, then you can follow the instructions in the original Fresh Loaf recipe. If not then you will have the sticky fun of kneading it.  I suggest you follow the Richard Bertinet method as per his video here


(This one is for doughnuts, but the technique is the same..)

You'll notice that Richard Bertinet adds the butter in at the beginning. Which makes the kneading much easier, as the butter makes the dough silky. However, we are going for the traditional brioche route, also known as making life nice and hard for ourselves. We are going to add the butter after the initial kneading, so expect it to stay VERY sticky for quite a while in the initial stages. Have a good scraper near you, a bowl of hot soapy water in the sink for emergency, and ignore the phone or the man at the door.

Once the dough is starting to come together nicely, after about 10 minutes of slapping, add 70g of room temperature butter cut into lumps. The recipe says to add it piece at a time, but I decided that this was going to add faff to faff, so it got added all in one go, but dabbed onto the spread out dough, as if making rough puff pastry, along with the orange zest. Then roll up the dough and squish and slap until you have a satiny smooth cushion of dough.

 If you are using a stand mixer, I mixed for 4 minutes on medium speed using the bread hook, and then added the butter in four lots, letting the mixer incorporate each one before adding in the next and adding the zest in with the last lot. Then I mixed for a further 4 minutes on medium until the dough was very supple and shiny. Drop the dough into an oiled container and cover tightly, bulk ferment for 90 mins to 2 hours until fully doubled. Degas the dough by gently folding it in the bowl, remove from the bowl and scale into 35g portions.

Shape each piece into a ball and rest covered for half an hour. Shape each little ball into a tiny batard, or torpedo shape. Flatten down and cut three slits in the sides of each piece Stretch them slightly as you put them on a parchment covered baking tray to proof. They should look roughly like this but without the slits in the middle - there isn't room for the inner slits on the mini size. These in the picture are the bigger 60-70 g pieces that make full sized gibs, I love the tiny ones even better but make whichever size suits you.


Cover with cling film again, and allow to proof for another hour to 90 mins until very puffy and light looking. Glaze with beaten egg mixed with a little milk.

Preheat the oven to 400 F/200 C (350/180 for a fan oven) gas mark 6, and bake the buns for about 10 minutes until golden. Check the underside, you want that to be golden as well, but be aware if you cooking on a silicone tray liner that the bases are not likely to brown underneath, in which case turn them over for a couple of minutes.

I got 30 mini buns out of my mixture, so they were on three trays. The cooking is short enough that just cook the first two trays, swap them about half way to even the browning, and then cook the third tray.

Take them out and put them on a cooling rack with a sheet of parchment underneath the tray. Brush both sides of the bun in melted butter whilst still hot, and then toss in caster sugar to coat. Put back on the rack to fully cool. They freeze beautifully, so don’t worry about having too many.

I keep enough out of the freezer for a couple of days, and heat them for about 5 minutes before serving as I like them best slightly warm, it brings the orange flavours out.


I do hope you give these a go if you haven't yet, they aren't difficult although there are a lot of stages to making them. But they are so good, they are really worth it!

The best of A Greedy Piglet.. The Gibassiers d'Orford

(first published on A Greedy Piglet in November 2012)

I am in love.

With a bun. Not any old bun mind you, a very French bun. A Gibassier.


The Gibassier is an enriched brioche type bun, scented with orange flower water, with anise seeds and candied orange peel, that is a speciality of Provence. It is a variation of the Pompe a l'huile that is usually served as one of the Treize Desserts that are traditionally served at Christmas in France.

I ran into this special bun at The Pump Street Bakery in Orford, a very special bakery, very close to my heart, where Chris Brennan, the masterful master baker makes the most delicious bread and cakes. At the weekend, he makes these special breakfast buns, and I was so lucky that it was on a Saturday that I visited and found them.

I was only there for the weekend, but decided to make a detour on the way home to pick up some more buns to take home. Oh disaster! they were only made for Saturday, and they sold out really quickly. No buns for me to take home :(

This was terrible. I had only eaten one, and I was hooked already. There was only one thing for it. I had to learn how to make them.

There are a few recipes online, and I settled on one at The Fresh Loaf, (an excellent resource for all things baking by the way, if you haven't been there yet.. ) as it was well detailed and seemed to have good remarks as to how it came out.

I followed it to the letter. Exactly. (except that it was hand kneaded, not machine as in the recipe, as I don't have a stand mixer (yet)). It was good. But not perfect.

It came out like this:


They look lovely, and quite close to what I want. The crumb was just a LITTLE bit on the tight side. I wanted them a teeny bit lighter. So I tweaked the recipe.

I added a little more milk and extra yeast to the preferment. Slightly more egg, slightly more water, a little extra olive oil (because the bottle slipped.. oops) I mixed bread flour and OO flour instead of using all bread flour. And I upped the yeast in the main mixture too.

So now we have:

Preferment:
180g bread flour (I used Dove Farm)
110g whole milk (I used unhomogenised Jersey, a VERY whole milk... )
half teaspoon Dove Farm instant yeast.

Mix all together thoroughly, leave covered tightly at room temperature overnight.

The following morning you will need the following ingredients :

Dough:

Liquid part:
3 x whole large eggs
Olive oil 80 g
42g Orange Blossom Water (I used English Provender, the usual one you can find in the supermarket)
(I added in a half teaspoon of Valencian Orange extract)
35g warm water

Dry part:
200g 00 flour (I use Sainsbury's Taste the Difference 00 flour)
200g bread flour
100g caster sugar
7g (one tsp) fine salt
15g instant yeast

Additions:
70g unsalted butter
1 heaped teaspoon anise seeds
70g Chopped candied orange peel (I used Waitrose Italian Orange peel, nice and squishy)
120g melted butter
Caster sugar for finishing

Mix the liquids in a bowl and squish in the preferment. It won't fully dissolve but will be easier to combine with the rest of the dry ingredients.

Combine the dry ingredients in a bowl and then add the liquid ingredients above. Now comes the fun part. If you have a stand mixer, then you can follow the instructions in the original Fresh Loaf recipe. If not then you will have the sticky fun of kneading it. I followed the instructions here for kneading a la Richard Bertinet.


Some recipes tell you to add the butter in at the beginning. Which makes the kneading much easier, as the butter makes the dough silky. However, we are going for the traditional brioche route, also known as making life nice and hard for ourselves. We are going to add the butter after the initial kneading, so expect it to stay VERY sticky for quite a while in the initial stages. Have a good scraper near you, a bowl of hot soapy water in the sink for emergency, and ignore the phone or the man at the door.
Once the dough is starting to come together nicely, after about 10 minutes of slapping, add 70g of room temperature butter cut into lumps. The recipe says to add it piece at a time, but I decided that this was going to add faff to faff, so it got added all in one go, but dabbed onto the spread out dough, as if making rough puff pastry. Then roll up the dough and squish and slap until you have a satiny smooth cushion of dough. Pat the dough out flat, and sprinkle over the anise seeds and the orange peel, roll up and knead lightly.

Drop the dough into an oiled container and cover with oiled plastic, bulk ferment for 90 mins to 2 hours until fully doubled. Degas the dough by punching down in the bowl, remove from the bowl and scale into 60-70g portions - on my first tryout I scaled to 100g but this was too big, 60-70 is a good size I think, but you can make to any size you like.

Shape each piece into a ball and rest covered for half an hour. Shape each little ball into a tiny batard, or torpedo shape. Flatten down and cut the slits in the bread, three in the middle like a fan, then one between the points of the fan. Stretch them slightly as you put them on a parchment covered baking tray to proof. They should look roughly like this, although next time I might make them a little fatter and not as long:


You will need to sort yourself out a little cutter about an inch (25mm) wide that you can punch down into the dough to cut, you don't want to use a knife as it will just drag the dough. I found a scraper that had an odd piece at the end. I've never worked out what it was for, but it is the ideal shape for cutting these slots.


Cover with cling film again, and allow to proof for another hour to 90 mins until very puffy and light looking.
Glaze with beaten egg mixed with a little milk.
Preheat the oven to 400 F/200 C (350/180 for a fan oven) gas mark 6, and bake the buns for about 15 minutes until golden. Check the underside, you want that to be golden as well, if not, then turn them over and give another 5 minutes.

I got 19 buns out of my mixture, so they were on two trays. They were a little too close together so they merged a bit, but pulled apart fine after baking. I swapped the trays in the oven halfway through the baking to even the browning.

Take them out and put them on a cooling rack with a sheet of parchment underneath (that's under the rack, not under the buns).

Brush both sides of the bun in melted butter whilst still hot, and then toss in caster sugar to coat. Put back on the rack to fully cool. For these 2nd tries, I sprinkled the sugar on rather than tossing them, but I think the coating is more even when they are tossed although it uses more sugar

.

They freeze beautifully, so don't worry about having too many. I keep enough out of the freezer for a couple of days, and heat them for about 5 minutes before serving as I like them best slightly warm, it brings the orange flavours out


.


I hope you decide to give them a go, they are a lot of work, but really worth the effort.